 That Pet Blog That Pet Place Pet Blog

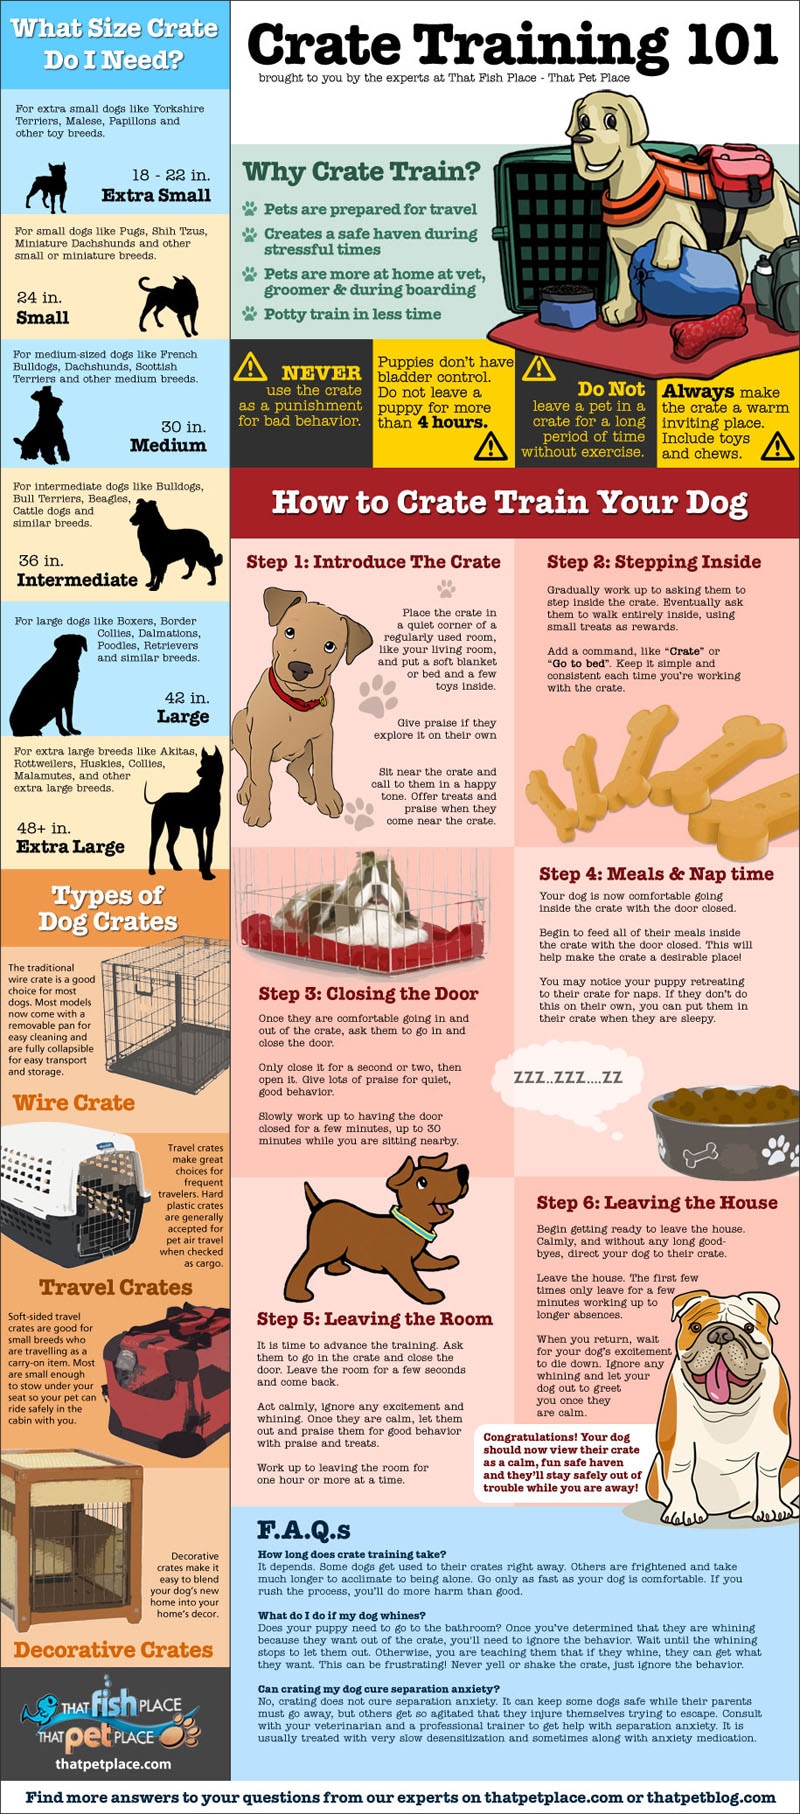 Crate training your dog may seem like a daunting task. In our last post of this series we discussed the benefits associated with crate training. This time we’ll focus on simplifying the crate training process into three easy steps that anyone can follow. You, too can have a successfully crate trained dog who is happy to sleep in their crate and retreat there when life becomes hectic!
After you select your dog crate, the first step is to slowly introduce the new furniture to your dog.
Step 1: Introduce the crate
• Select your location and put a soft blanket or crate pad in the crate. Add a few favorite toys and chews. Please note: do not provide chews and toys if you dog is a heavy chewer or is not trusted with chews while unsupervised. Some dogs can destroy toys or chews and suffer from impactions or choke on the pieces.
• If your dog begins investigating the crate on his own, provide plenty of praise and treats for going near or in the crate on his own. You’ll want to stock up on training treats for this process!
• If he does not come to investigate on his own, sit by the crate and talk to him in soft, soothing tones. Call him over to you. Remember to give treats and praise each time he comes near the crate.
• Once he is comfortable being around the crate, begin to toss small treats just inside the door. Praise him each time he goes in to retrieve the treat.
• Eventually toss the treats farther back until he goes the whole way inside the crate. Lots of praise and love during this step. This is the part that may take the longest. Remember never to force him into the crate. You want him to choose to enter the crate on his own.
The key that many people disregard is that crate training does not happen overnight. Depending on your individual dog, this process could take weeks. You want to take it slow and only proceed once your dog is 100% comfortable with the previous step. If they begin to show reluctance or are clearly uncomfortable, slow your pace down and return to the previous step. Read More »
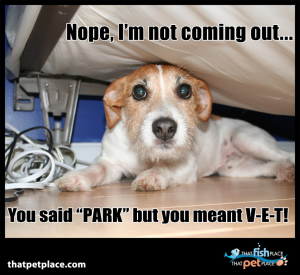 Everyone has a vet that they see regular for unexpected illnesses and regular exams for their furry family members, but did you know that your veterinary clinic might provide these additional services for caring for your pets? Cutting back on the number of places your dog goes for services can help alleviate their stress, turn the vet into a more positive trip than usual, and can help them socialize (an important part of overall wellness).
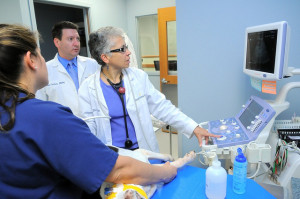 Preventative medicines such as vaccines are a great way to keep you pets healthy as well as free from various unwanted diseases and parasites. Most of the veterinarians advise that the pets should be examined at least once a year. During this examination one can discuss any of the doubts or concerns that one have about the pet with the vets. Also you can discuss about the pet’s dental needs, exercise needs as well as issues regarding what type of diet would be appropriate for the pet’s health. Also the veterinarian would be pleased to give you advice on the proper vaccinations. [Many veterinarians recommend a checkup every 6 months for senior pets – so be sure to schedule your senior pet’s checkup today!]


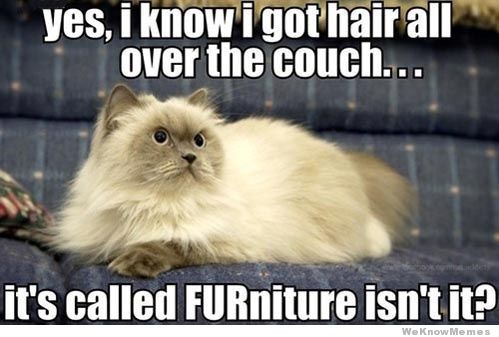 Lots of people I know don’t have pets because they’re afraid that a pet might destroy their belongings or otherwise cause destruction and mayhem. While this is definitely the case with some pets, there are steps you can take to mitigate the damage and take on a furry family member. The love that you receive from a cat or a dog in the house is unlike any other kind of love you’ll ever experience. It is an experience to cherish and hold dear, though I heartily admit pet ownership isn’t right for everyone.
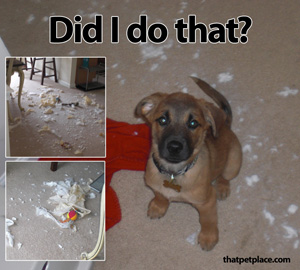 2. Nice belongings.


 not to bring your pet along to holiday gatherings make sure they’re left with plenty of fresh water and maybe a special chewy or treat to keep them occupied for the day. If you’re going away for longer than a day be sure to either make arrangements to have your pet boarded at a kennel or cared for by a trusted friend or service, either from your home or in their space.